Proxmox Virtual Environment (Proxmox VE) is a powerful, open-source platform for virtualization. It allows you to run virtual machines (VMs) and containers efficiently, making it perfect for homelabs. This guide walks you through deploying a Proxmox VE server, enabling you to consolidate workloads and experiment with virtualized environments.
What You’ll Need
- A dedicated machine for Proxmox VE (minimum specs: 4 GB RAM, 64-bit processor, and 32 GB storage).
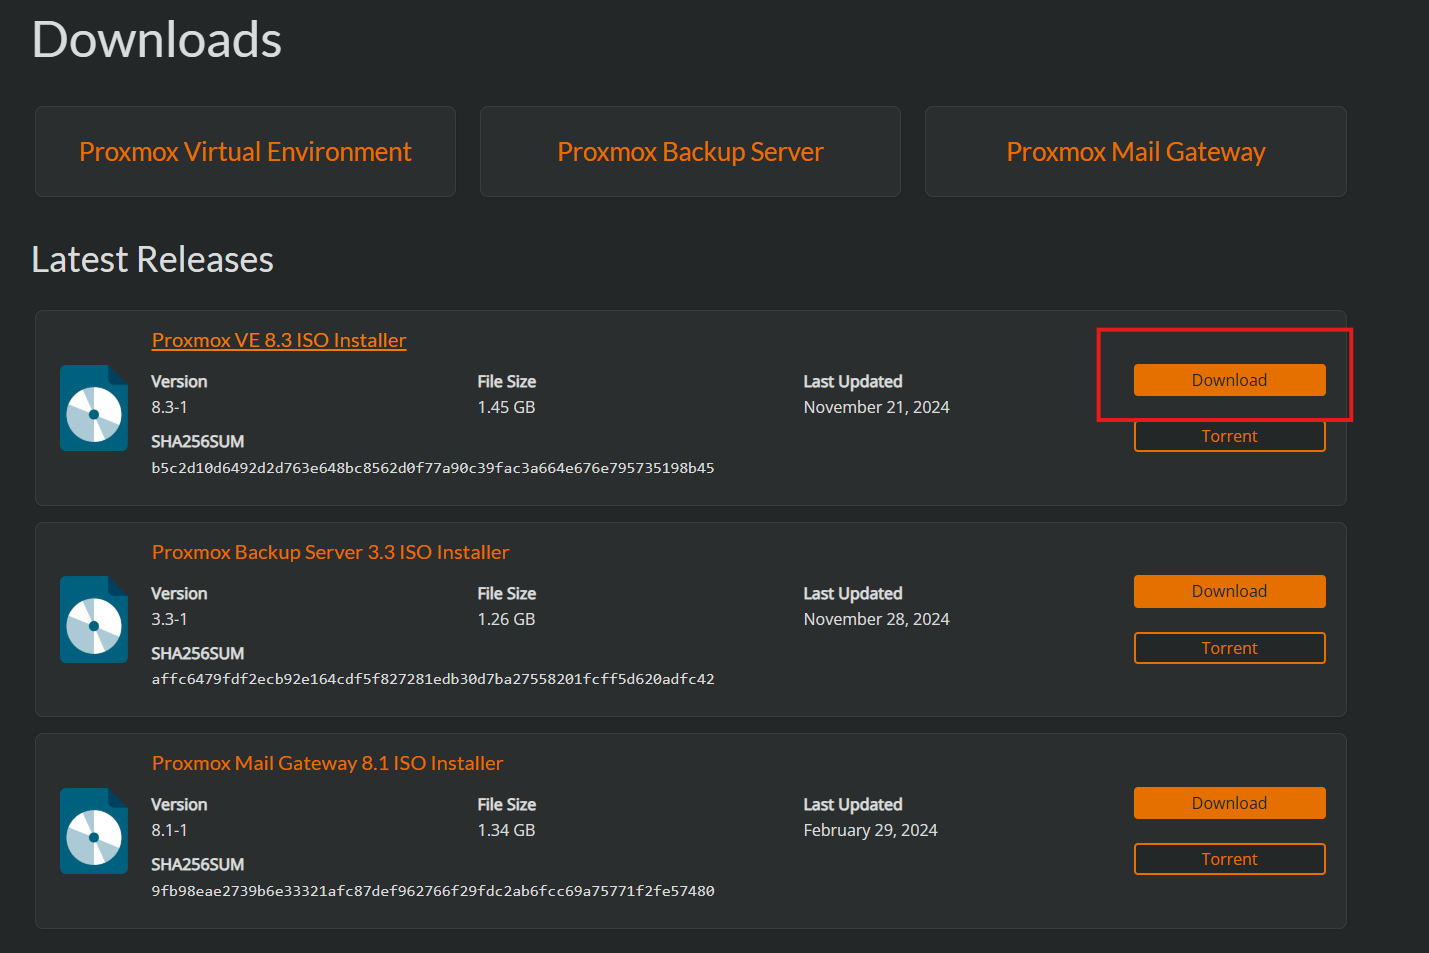
- Proxmox VE ISO file from the Proxmox download page.
- A USB drive (at least 8 GB) for creating bootable media.
- A reliable internet connection.
Step 1: Prepare the Installation Media
- Download the Proxmox VE ISO file from the official website.

- Use a tool like Rufus or balenaEtcher to create a bootable USB drive with the Proxmox ISO.
Step 2: Install Proxmox VE
-
Insert the bootable USB into your server and boot from it.
-
Follow the installation wizard:
- Accept the license agreement.
- Select the target disk for installation.
- Configure the root password and email address.
- Set the network configuration (assign a static IP address for easier access).
-
Complete the installation and reboot the server. Remove the USB drive during the reboot.
Step 3: Access the Proxmox Web Interface
- On another device, open a web browser and go to:
https://<your_proxmox_ip>:8006
- Log in using the root credentials set during installation.
Step 4: Update and Configure Proxmox VE
- Update Proxmox VE to ensure it has the latest features and security patches:
apt update && apt full-upgrade -y
- Disable the enterprise repository (if you’re not using a subscription):
sed -i 's|deb https://enterprise.proxmox.com/debian|#deb https://enterprise.proxmox.com/debian|' /etc/apt/sources.list.d/pve-enterprise.list
- Add the Proxmox community repository:
echo "deb http://download.proxmox.com/debian/pve bullseye pve-no-subscription" | sudo tee /etc/apt/sources.list.d/pve-no-subscription.list
- Refresh package lists and update:
apt update && apt full-upgrade -y
Step 5: Set Up Storage
- Navigate to the Datacenter section in the web interface.
- Configure storage for VMs and containers:
- Add local storage for ISO images and backups.
- Add networked storage (NFS, CIFS) if needed.
Step 6: Create Your First Virtual Machine (VM)
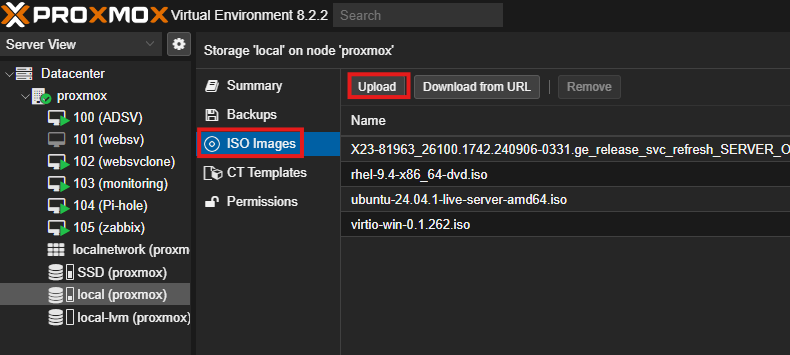
- Upload an ISO image (e.g., Ubuntu) to your Proxmox storage:
- Go to Datacenter > Storage > ISO Images > Upload.

- Create a new VM:
- Navigate to Create VM in the Proxmox web interface.
- Follow the wizard to assign resources like CPU, RAM, and disk space.
- Start the VM and install the operating system.
Step 7: Configure Containers (Optional)
Proxmox VE supports LXC containers, which are lightweight alternatives to VMs.
- Download container templates:
- Go to Datacenter > Storage > CT Templates > Templates > Download.
- Create a container:
- Navigate to Create CT and follow the wizard.
Step 8: Backup and Restore
- Set up backups to ensure data safety:
- Go to Datacenter > Backup > Add to schedule backups.
- Restore VMs or containers by selecting Restore from the backup menu.
FAQs
Q: What is the difference between a VM and a container in Proxmox VE?
A: VMs emulate an entire operating system, while containers share the host kernel, making them more lightweight and faster to deploy.
Q: Can I use Proxmox VE on a Raspberry Pi?
A: No, Proxmox VE requires a 64-bit x86 processor, which Raspberry Pis do not support.
Q: How do I add a second storage drive to Proxmox VE?
A: Use the web interface to configure storage:
- Go to Datacenter > Storage > Add and choose the storage type (e.g., Directory, LVM, NFS).
Q: Does Proxmox VE support GPU passthrough?
A: Yes, Proxmox VE supports GPU passthrough for VMs, allowing direct access to the GPU for intensive workloads.
Q: Is Proxmox VE free?
A: Yes, Proxmox VE is free and open source. However, you can purchase a subscription for access to the enterprise repository and support.
Q: How do I access VMs from another device?
A: Use the Proxmox web interface to access VMs via the integrated console or configure network access to the VM for SSH, RDP, or VNC.
Q: Can I run Proxmox VE as a VM itself?
A: Yes, Proxmox VE can run as a VM for testing purposes, but nested virtualization must be supported by the host.
Proxmox VE is a versatile platform that can turn your homelab into a virtualization powerhouse. Experiment, learn, and unlock the full potential of your homelab!